When it comes to maintaining your home’s fence, fence repair is a crucial task to ensure its longevity and stability. Whether it’s a broken post or rotting wood, addressing fence damage promptly can save you time and money in the long run. In this article, we will provide you with a step-by-step guide on how to repair a fence in your house, including assessing the damage, gathering materials and tools, removing the broken post, installing a new post, curing concrete, reattaching hardware, applying wood preservative or paint/stain, and regular fence maintenance.

Step 1: Assess the Damage and Gather Materials/Tools The first step in fence repair is to carefully assess the extent of the damage. If the fence post is completely broken or severely rotting, it may need to be replaced. Purchase a new fence post that matches the size and type of your existing posts, and gather all the necessary materials and tools, such as concrete mix, water, shovel or post hole digger, level, hammer, nails or screws, and wood preservative or paint/stain if desired


Step 2: Remove the Broken Post and Any Hardware Next, use a shovel or post hole digger to dig around the broken post and expose the base. Remove any concrete around the post and clear away debris. If the post is still partially intact, use a hammer to remove any remaining pieces and detach any hardware, such as brackets or screws.
Step 3: Install the New Post, Ensuring It Is Plumb Place the new fence post in the hole and use a level to ensure it is perfectly vertical (i.e., plumb). Make adjustments as necessary to ensure the post is aligned properly.


Step 4: Pour and Cure Concrete Around the New Post Mix the concrete according to the manufacturer’s instructions and pour it into the hole around the post, filling it to the top. Use a level again to double-check the post’s alignment and adjust as necessary. Allow the concrete to cure as per the manufacturer’s instructions before proceeding.
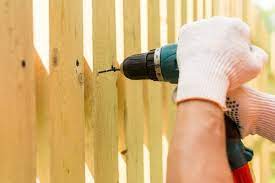
Step 5:Once the concrete has fully cured, reattach any hardware, such as brackets or screws, to secure the new post in place. Use nails or screws to connect the fence panels or boards to the new post, as needed.


Step 6: Apply wood preservative, paint, or stain if desired. Apply wood preservative to the new post and surrounding fence components, if desired, to protect against rot and extend the fence’s lifespan. You can also paint or stain the repaired area to match the rest of the fence, if desired, for a finished look.
With the right materials, tools, and know-how, repairing a fence in your house can be a manageable DIY project. By assessing the damage, gathering materials and tools, removing the broken post, installing a new post, curing concrete, reattaching hardware, and applying wood preservative or paint/stain, you can restore the stability and appearance of your fence, prolonging its lifespan and protecting your investment. Regular fence maintenance will also help prevent future damage and ensure the continued durability of your fence.


Recent Comments