Why Add A Drainage System?
- Adding a drainage system to your deck keeps the area below dry, protecting against rot and decay.
- It prevents the growth of mold and mildew, creating a healthier environment.
- A drainage system enhances the aesthetics of your deck by keeping the area clean and debris-free.
- It can increase the value of your property by adding a functional and well-maintained outdoor living space.
- Overall, a well-designed and properly installed drainage system creates a more enjoyable, functional, and visually appealing deck space while protecting your investment for years to come.
Types Of Drainage Systems
There are several types of drainage systems that can be used for under-deck applications. Some of the common types include:
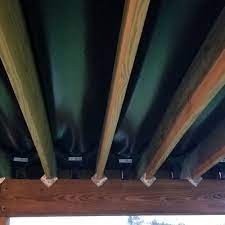
- Under-deck ceiling system: This type of system typically consists of a series of ceiling panels that are installed beneath the deck joists, creating a waterproof barrier to channel water away
- from the deck surface. These panels are usually made of vinyl or aluminum and are designedto be easily installed and removed for maintenance or repairs.
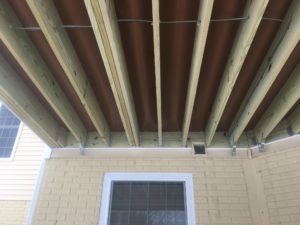
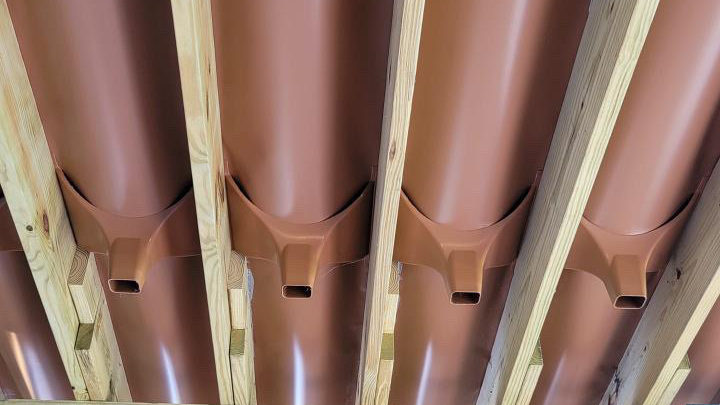
- .Trough and downspout system: This type of system involves the installation of troughs or gutters along the perimeter of the deck to collect water and direct it towards downspouts or drains. The downspouts or drains are then connected to a drainage system or directed to a designated area for water runoff.
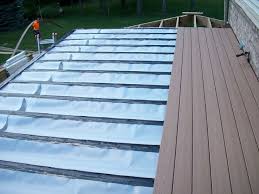
- Membrane or rubberized system: This type of system involves the use of rubberized or waterproofing membranes that are installed over the deck joists and under the deck boards. These membranes create a barrier to prevent water from seeping into the joists and framing, effectively channeling water away from the deck surface.
- French drain system: This type of system utilizes a gravel-filled trench or pipe system installed along the perimeter of the deck to collect and redirect water away from the deck area. It typically involves digging a trench, installing a perforated pipe, covering it with gravel, and then backfilling the trench with soil.
Step-By-Step Guide To The Setup
-
Step 1: Plan and Design
- Measure and assess the area below your deck to determine the size and shape of your drainage system.
- Consider local weather conditions, budget, and aesthetic preferences to select the appropriate type of drainage system.
- Create a detailed plan and design for your drainage system, including the placement of troughs, downspouts, and any necessary slope or pitch for water runoff.

Step 2: Gather Materials and Tools
- Purchase or gather all the necessary materials and tools for your chosen drainage system, such as troughs, downspouts, membranes, rubberized sheets, gravel, pipes, connectors, screws, and other hardware.
- Make sure you have the proper tools for the installation, such as a drill, screws, saw, level, measuring tape, and other relevant tools.
Step 3: Install Troughs or Membranes
- If using an under-deck ceiling system, install the vinyl or aluminum troughs or panels beneath the deck joists according to the manufacturer’s instructions. Ensure they are level and properly secured.
- If using a membrane or rubberized system, install the waterproofing membrane over the deck joists and under the deck boards, following the manufacturer’s instructions. Make sure it covers the entire deck area and is properly sealed.
Step 4: Install Downspouts or Pipes
- Install the downspouts or pipes to connect the troughs or membranes to the designated drainage area. Ensure they are properly positioned and securely fastened
Step 5: Install Gravel or French Drain
- If using a gravel-filled trench or French drain system, dig a trench along the perimeter of the deck and line it with landscape fabric to prevent soil and debris from clogging the drain.
- Fill the trench with gravel and install a perforated pipe on top, ensuring proper slope and pitch for water runoff. Cover the pipe with more gravel and backfill the trench with soil.
Step 6: Test and Adjust
- Test your drainage system by pouring water onto the deck surface and observing how it drains away from the deck area.
- Make any necessary adjustments to the slope, pitch, or position of the troughs, downspouts, or drain pipes to ensure proper water runoff.
Step 7: Finalize and Maintain
-
-
- Once you’re satisfied with the performance of your under-deck drainage system, finalize the installation by securing all components, checking for any leaks, and making any final adjustments.
- Regularly inspect and maintain your drainage system, clearing debris, checking for any damage or clogs, and making necessary repairs or replacements as needed to ensure its continued effectiveness.
-

Recent Comments